
How it works
The Web connector scrapes sites from a Base URL.- It only indexes files from the same domain that share the same base path.
- It indexes pages reachable via hyperlinks from the base URL.
- Page text is cleaned up, and metadata such as the page title is extracted.
Setting up
Setup runs through three steps: configure the connector, choose a space, then set sync options.Step 1: Configure the connector
- Open Admin → Connectors → Add Connector.
- Select the Web connector.
- Enter a Connector Name — a descriptive name for this connector.
- Enter the Base URL to scrape.
- Choose a Scrape Method.
- Click Continue.
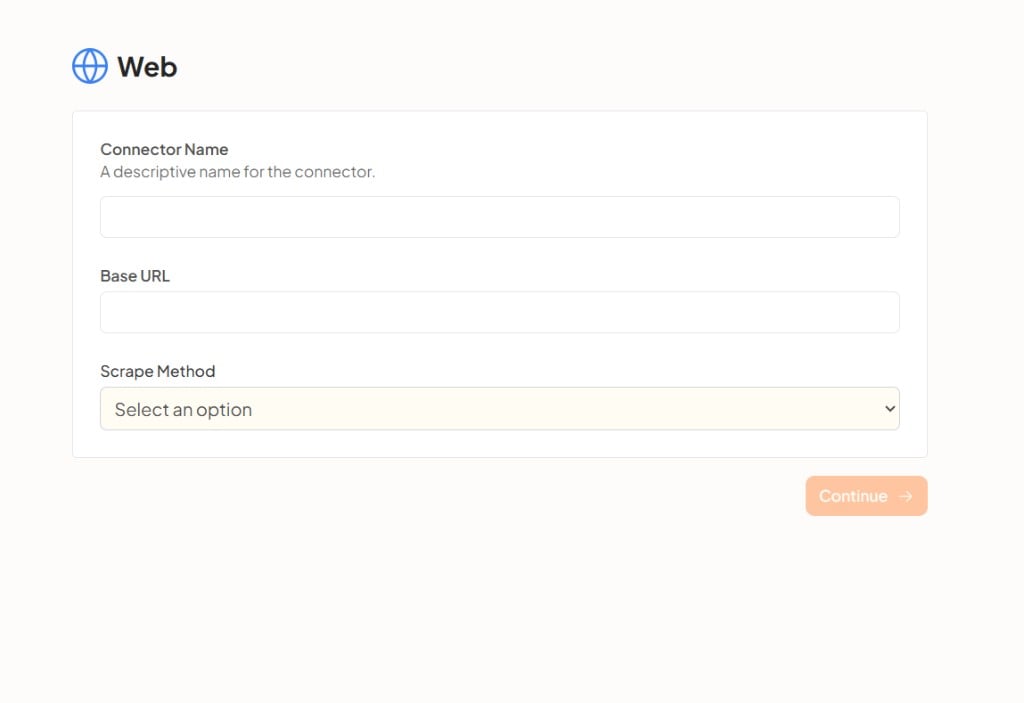
Step 2: Select a space
Choose the space to index the documents from. This controls which space the connector’s indexed content belongs to.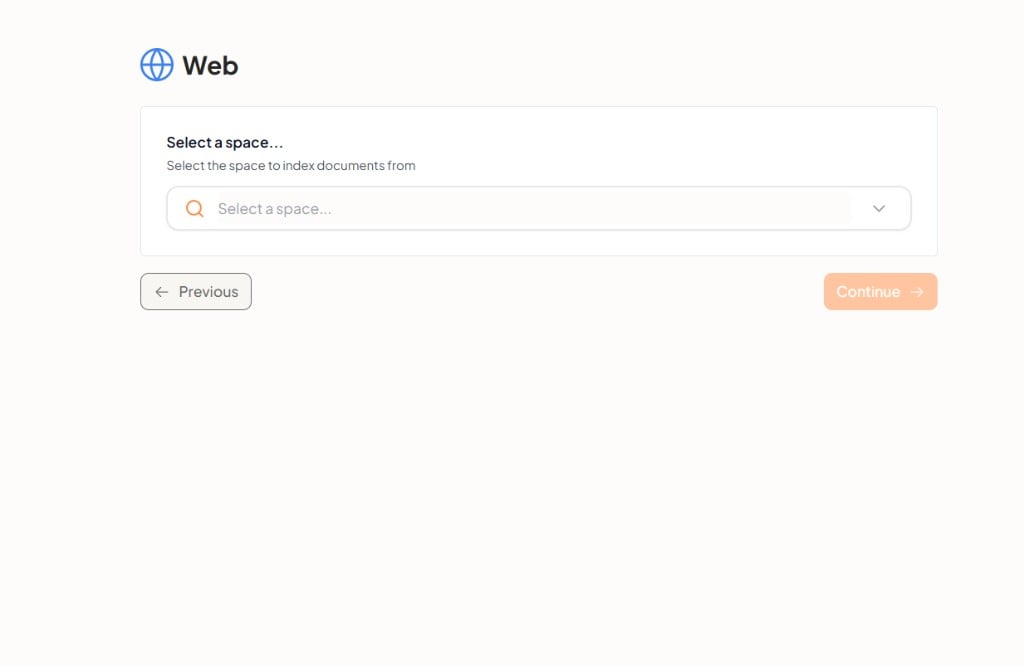
Step 3: Advanced Configuration
The final step controls how often UtopikAI syncs with the site and how far back it indexes. The defaults work for most setups.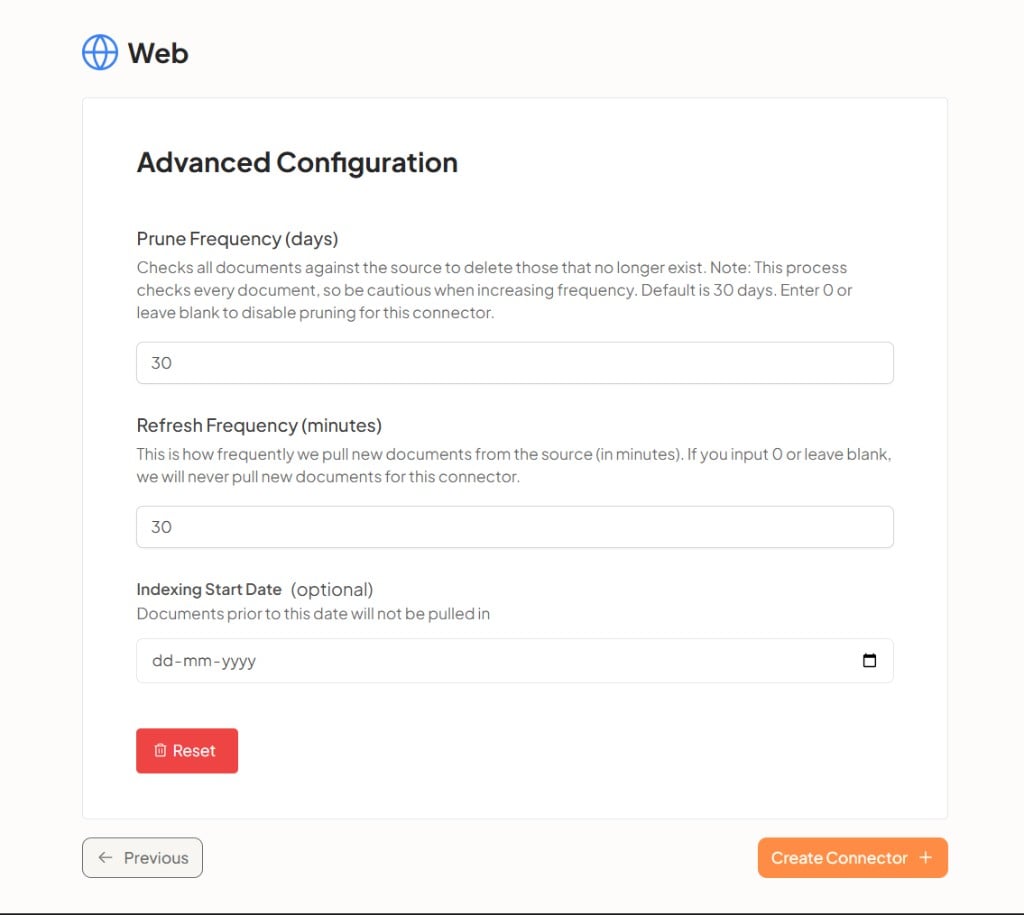
Entering
0 or leaving Refresh Frequency blank means UtopikAI will never pull new documents for this connector.
Entering 0 or leaving Prune Frequency blank disables pruning for this connector. Pruning checks every document against the source, so be cautious when increasing frequency.
Use Reset to restore the default values.
When you are done, click Create Connector to save the connector and begin indexing. You can return to an earlier step with Previous.