
How it works
The R2 connector pulls in all documents from the specified Cloudflare R2 bucket. It supports various file formats including PDF, DOC, DOCX, TXT, and more. Documents are updated every 1 day.Setting up
Setup runs through four steps, shown in the left rail of the connector page: Credential, Connector, Space, and Advanced.Authorization
Before configuring the connector in UtopikAI, create an R2 API token in your Cloudflare dashboard:- Log into your Cloudflare dashboard.
- Navigate to R2 in the sidebar.
- Click Manage R2 API Tokens.
- Click Create API token.
- Give your token a name (for example
UtopikAIR2Connector) and select Object Read only permissions. - Click Create API Token.
- Copy the Access Key ID and Secret Access Key immediately — you cannot view the secret again after leaving this screen.
- Find your Account ID on the Cloudflare dashboard Overview page. It appears in the URL as the final path segment, or in the account details sidebar.
Add the connector
- Open Admin → Connectors → Add Connector.
- Under Storage, select R2.
- Create or select an R2 credential (see below).
- Configure the bucket to index.
- Complete the remaining steps and save the connector to start indexing.
Step 1: Select Credential
- Open Admin from the profile menu, then go to Connectors → Add Connector.
- Under Storage, select R2.
- In Step 1, select an existing credential from the list, or click Create New to add one.
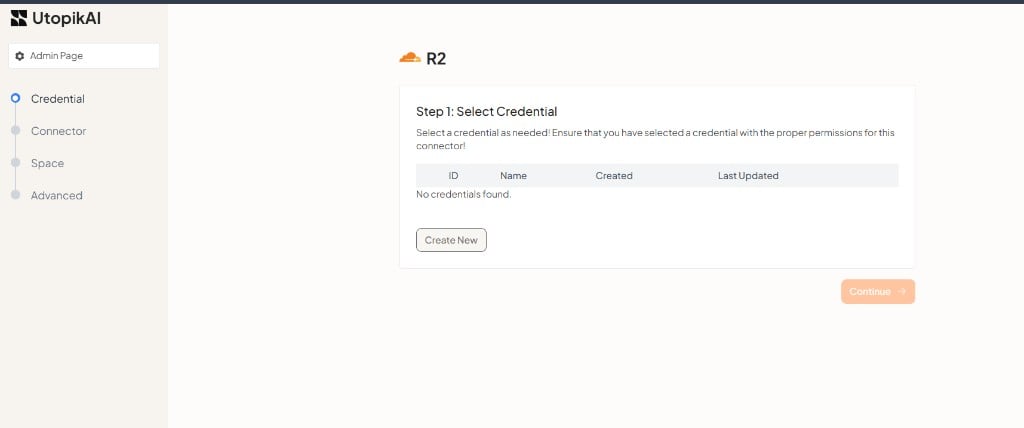
Ensure the credential you select has the proper permissions for this connector. A credential without read access to the bucket you want to index will not be able to pull documents.
Create a credential
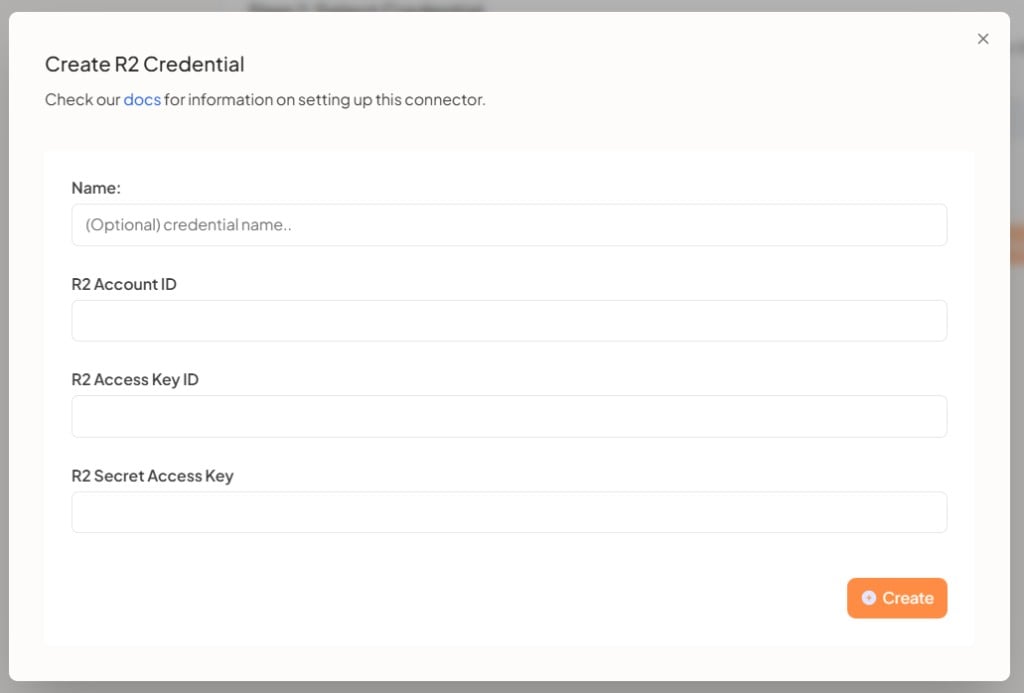
If you do not have an R2 credential yet, click Create New to open the credential dialog:- Optionally enter a Name to label the credential (for example
Production R2). - Enter your R2 Account ID, R2 Access Key ID, and R2 Secret Access Key from the Cloudflare authorization steps above.
- Click Create.
Step 2: Configure the connector
- Enter a Connector Name — a descriptive name for this connector.
- Specify the R2 bucket you want to make searchable.
- Click Continue.
Step 3: Select a space
Choose the space to index the documents into. This controls which space the connector’s indexed content belongs to. Use the search field to filter the list if you have many spaces, then click Continue.Step 4: Advanced Configuration
The final step controls how often UtopikAI syncs with your R2 bucket and how far back it indexes. The defaults work for most setups.
Entering
0 or leaving Refresh Frequency blank means UtopikAI will never pull new documents for this connector.
Entering 0 or leaving Prune Frequency blank disables pruning for this connector.
When you are done, click Create Connector to save the connector and begin indexing. You can return to any earlier step using the Previous button or the step list in the left rail.