
How it works
The Dropbox connector indexes files stored in your Dropbox account, including the file name, file type, and file contents. You authorize UtopikAI through Dropbox’s OAuth flow and then choose exactly which files and folders to index — you do not need to create a Dropbox app or generate an access token manually.Setting up
Setup runs through four steps, shown in the left rail of the connector page: Credential, Connector, Space, and Advanced.Step 1: Select Credential
- Open Admin from the profile menu, then go to Connectors and select the Dropbox connector.
- Select an existing credential from the list, or click Create New to authorize a new one.
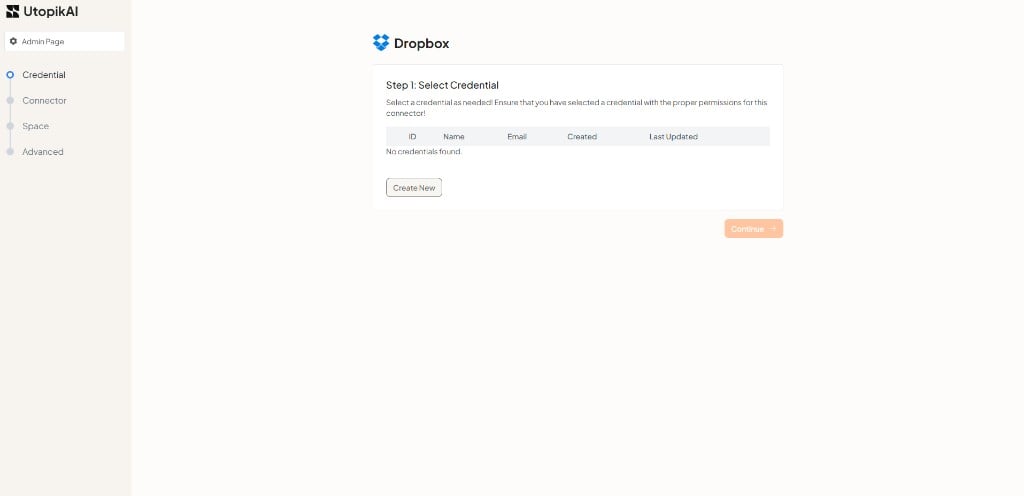
Ensure the credential you select has the proper permissions for this connector. A credential authorized by an account without access to the files you want to index will not be able to index them.
- View content of your Dropbox files and folders
- View and manage your Dropbox sharing settings and collaborators
- View basic information about your Dropbox account, such as your username, email, and country
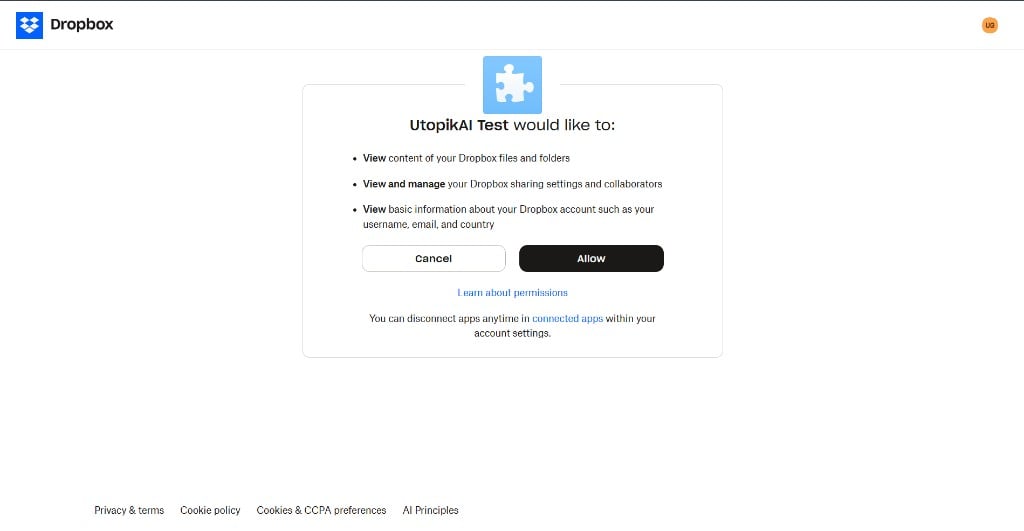
You can revoke access at any time from the connected apps section of your Dropbox account settings.
Step 2: Configure the connector
- Enter a Connector Name — a descriptive name for this connector.
- Under Select Files & Folders, choose which content to index. Expand a folder with the arrow to browse inside it, and use the checkboxes to select items.
- Click Continue.
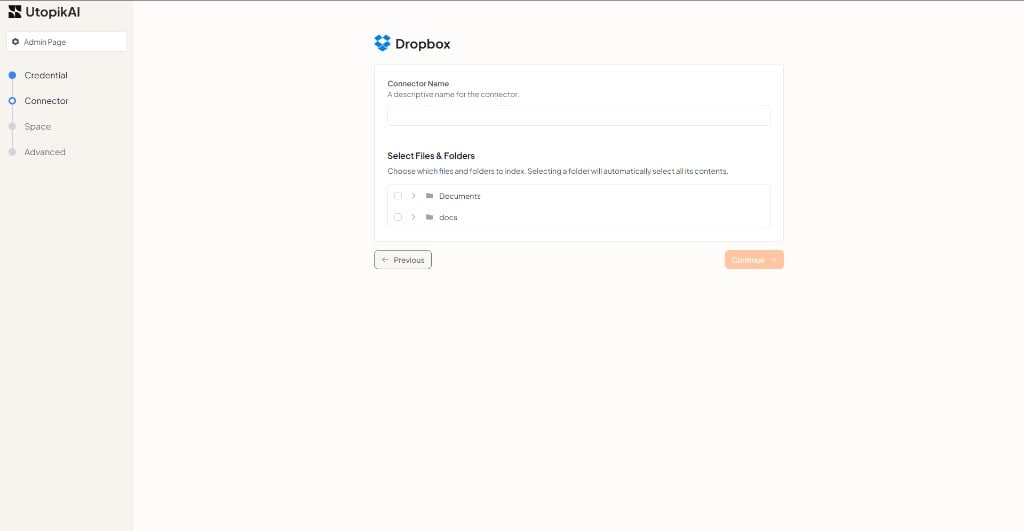
Step 3: Select a space
Choose the space to index the documents from. This controls which space the connector’s indexed content belongs to.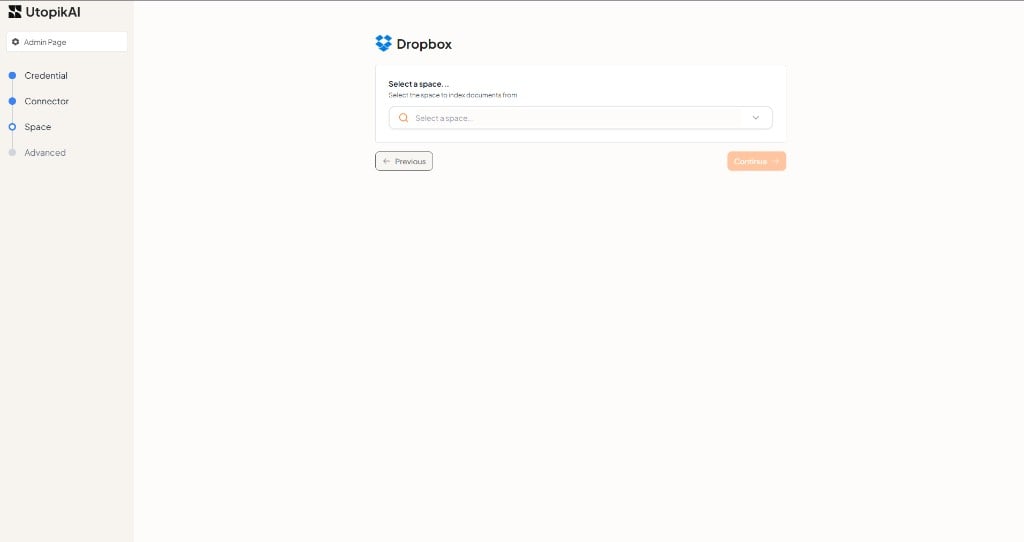
Step 4: Advanced Configuration
The final step controls how often UtopikAI syncs with Dropbox and how far back it indexes. The defaults work for most setups.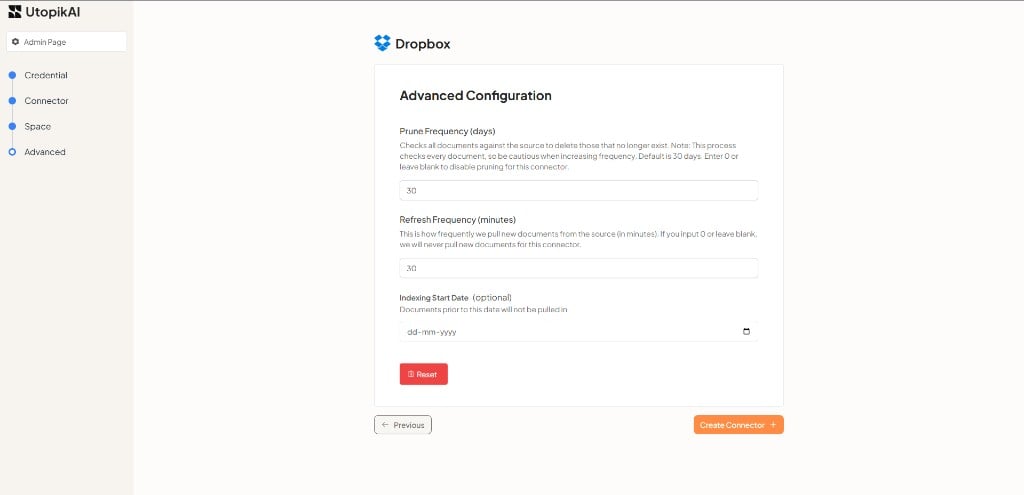
Entering
0 or leaving Refresh Frequency blank means UtopikAI will never pull new documents for this connector.
Entering 0 or leaving Prune Frequency blank disables pruning for this connector. Pruning checks every document against the source, so lower values (more frequent pruning) increase load — raise the frequency with care on large accounts.
Use Reset to restore the default values.
When you are done, click Create Connector to save the connector and begin indexing your Dropbox files. You can return to any earlier step using the Previous button or the step list in the left rail.