> ## Documentation Index
> Fetch the complete documentation index at: https://docs.utopikai.com/llms.txt
> Use this file to discover all available pages before exploring further.
# Image
> Create AI-generated images in Studio
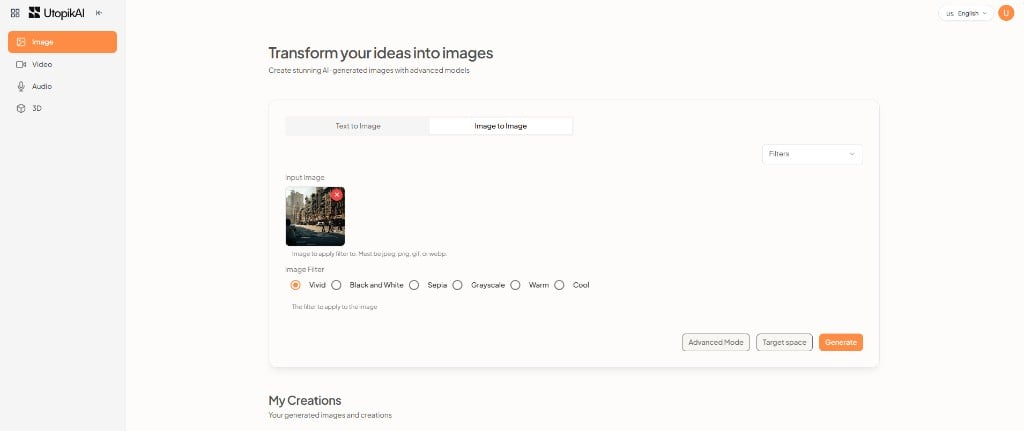
Open **Studio** → **Image**. The heading is **Transform your ideas into images**.
Choose a generation model, then pick a mode:
* **Text to Image** — Describe the image in a prompt.
* **Image to Image** — Start from an existing image and apply a filter or transformation.
Use **Advanced Mode** and **Target space** if you need extra settings or a destination space, then click **Generate**. Outputs appear under **My Creations**.
The live image catalog is on the [UtopikAI image models page](https://www.utopikai.com/models/image). Which models you see in Studio depends on your tenant.
## Image catalog
For pricing, see the [image models page](https://www.utopikai.com/models/image).
## Image to Image
1. Select the **Image to Image** tab.
2. Upload an **Input Image** (JPEG, PNG, GIF, or WebP).
3. Choose a model. Specialized options include **Filters**, **Cartoonify**, **Restore Image**, **Professional Headshot**, and **Bria Remove Background**.
4. If you use **Filters**, pick a look such as Vivid, Black and White, Sepia, Grayscale, Warm, or Cool.
5. Click **Generate**.
 ## Text to Image
Select the **Text to Image** tab, enter a prompt, choose a model, and click **Generate**.
## Related documentation
* [Studio Overview](/studio/overview)
* [Video](/studio/video)
* [Audio](/studio/audio)
* [3D](/studio/3d)
* [LLM](/gen_ai_configs/overview)
## Text to Image
Select the **Text to Image** tab, enter a prompt, choose a model, and click **Generate**.
## Related documentation
* [Studio Overview](/studio/overview)
* [Video](/studio/video)
* [Audio](/studio/audio)
* [3D](/studio/3d)
* [LLM](/gen_ai_configs/overview)