> ## Documentation Index
> Fetch the complete documentation index at: https://docs.utopikai.com/llms.txt
> Use this file to discover all available pages before exploring further.
# Sharepoint Connector
> Access files and notes from your Sharepoint Sites
## How it works
The Sharepoint connector will go through all configured sites belonging to an organization and
index all the documents attached to that site. Note, it currently does not parse the site page
contents, only the attached files.
This includes:
* Word Doc, Excel, PDF, Powerpoints, and all plaintext files like .txt, .mdx, etc.
## Setting up
### Authorization
More detailed instructions can be found following the video below.
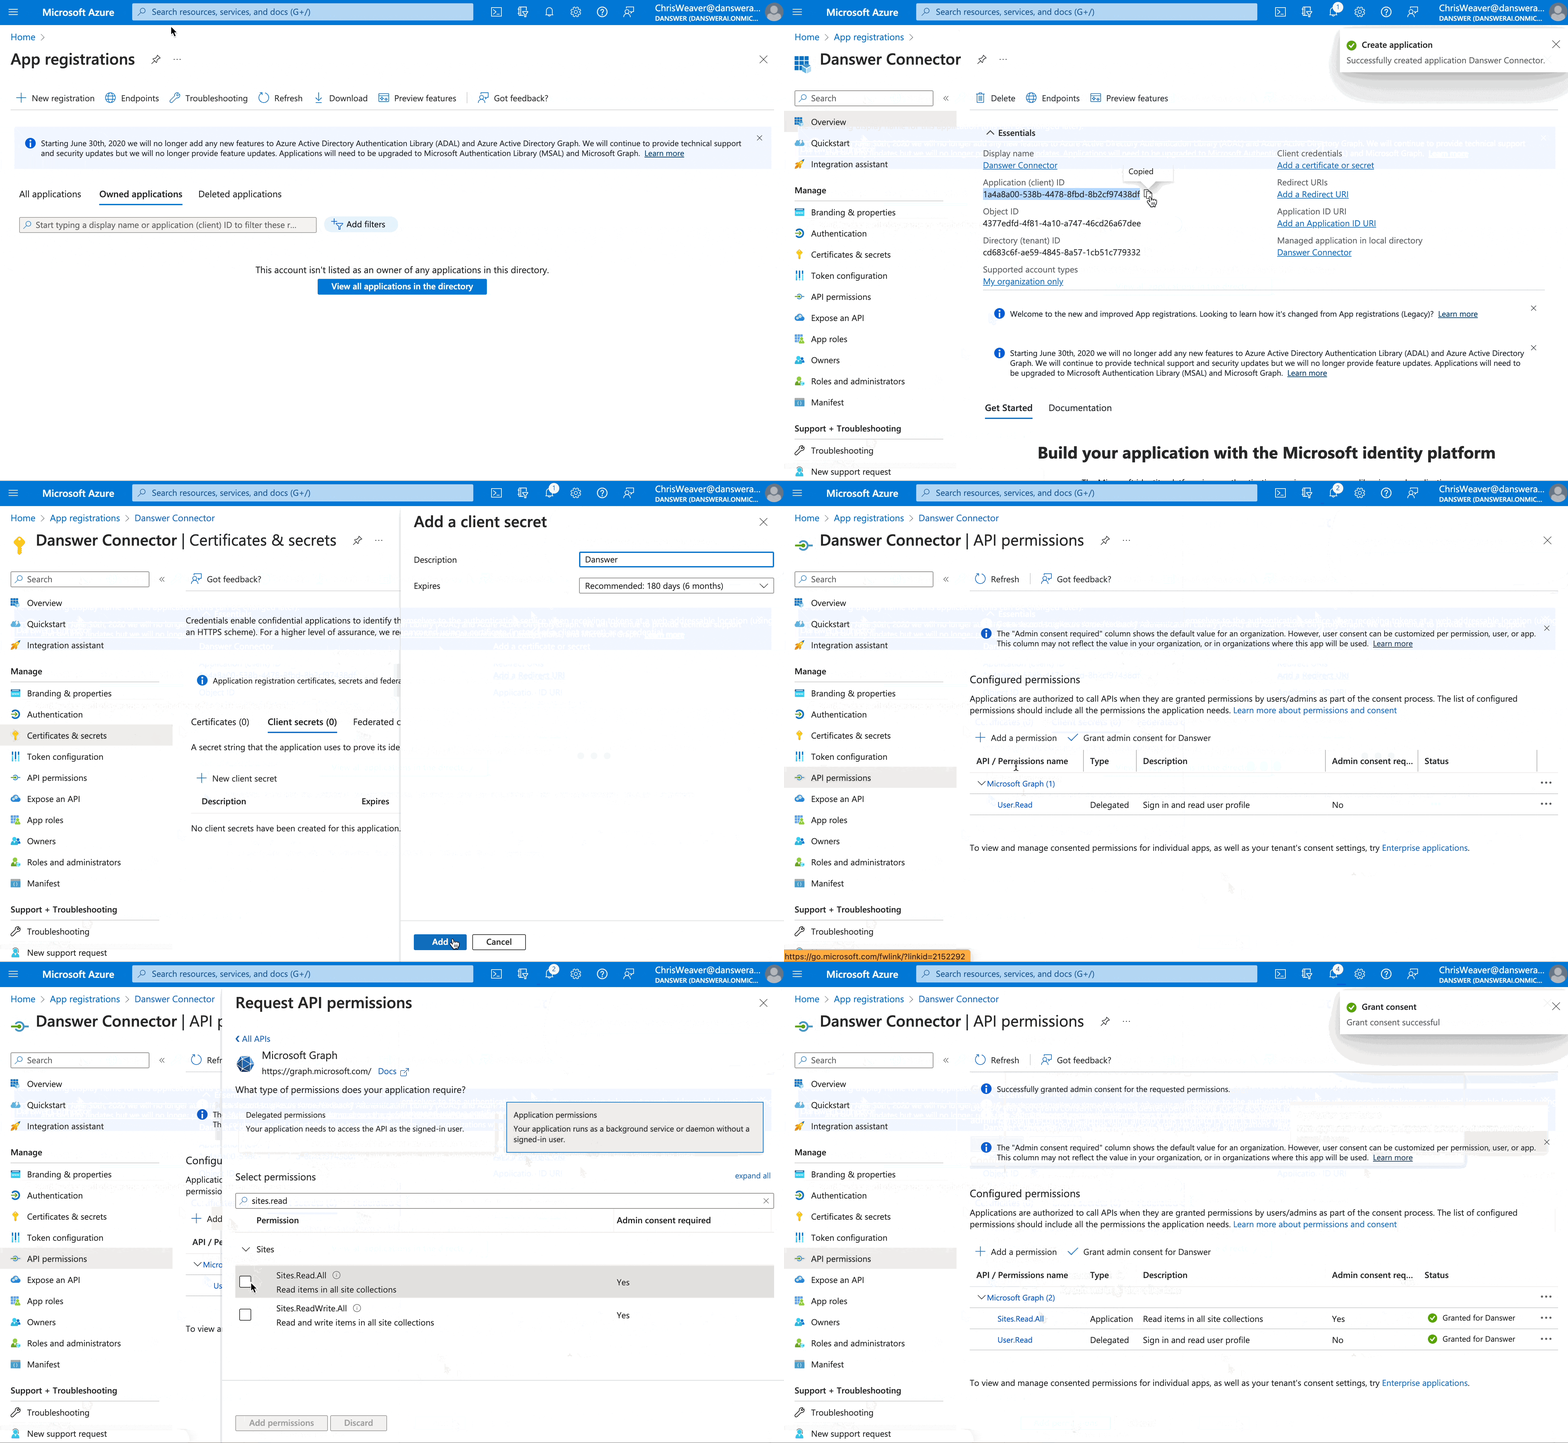 1. Log in to [azure portal](https://portal.azure.com/#home) for your organization.
2. Navigate to “app registrations” using the search bar.
3. Click `New Registration`.
4. Name it something like “UtopikAI Sharepoint Connector”, leave everything else as default, and click `Register`.
5. Under “Essentials” in the overview tab, you will find the **Application (client) ID** and **Directory (tenant) ID**. Save those for later.
6. Navigate to the “Certificates & secrets” tab in Azure Portal and click `New client secret`.
7. Fill out he description, set the expiration to 24 months, and click `Add`.
8. Copy the secret value in the **Value** column for later.
9. Navigate to the "Api Permissions" tab in the azure portal and click `add a permission`.
10. Click **Microsoft Graph**, then click on `Application permissions`.
11. Navigate to the “sites” permission group.
12. Select the checkbox for **Sites.Read.All**.
* *Advanced:* If you want to limit the sites this app has access to, select **Sites.Selected**. However, if you do this, you will need add the App you are currently registering to each site you want to index.
13. Click **Add permissions**.
14. Finally, click **Grant admin consent for \** (located next to **Add a permission**) and click **Confirm**.
### Indexing
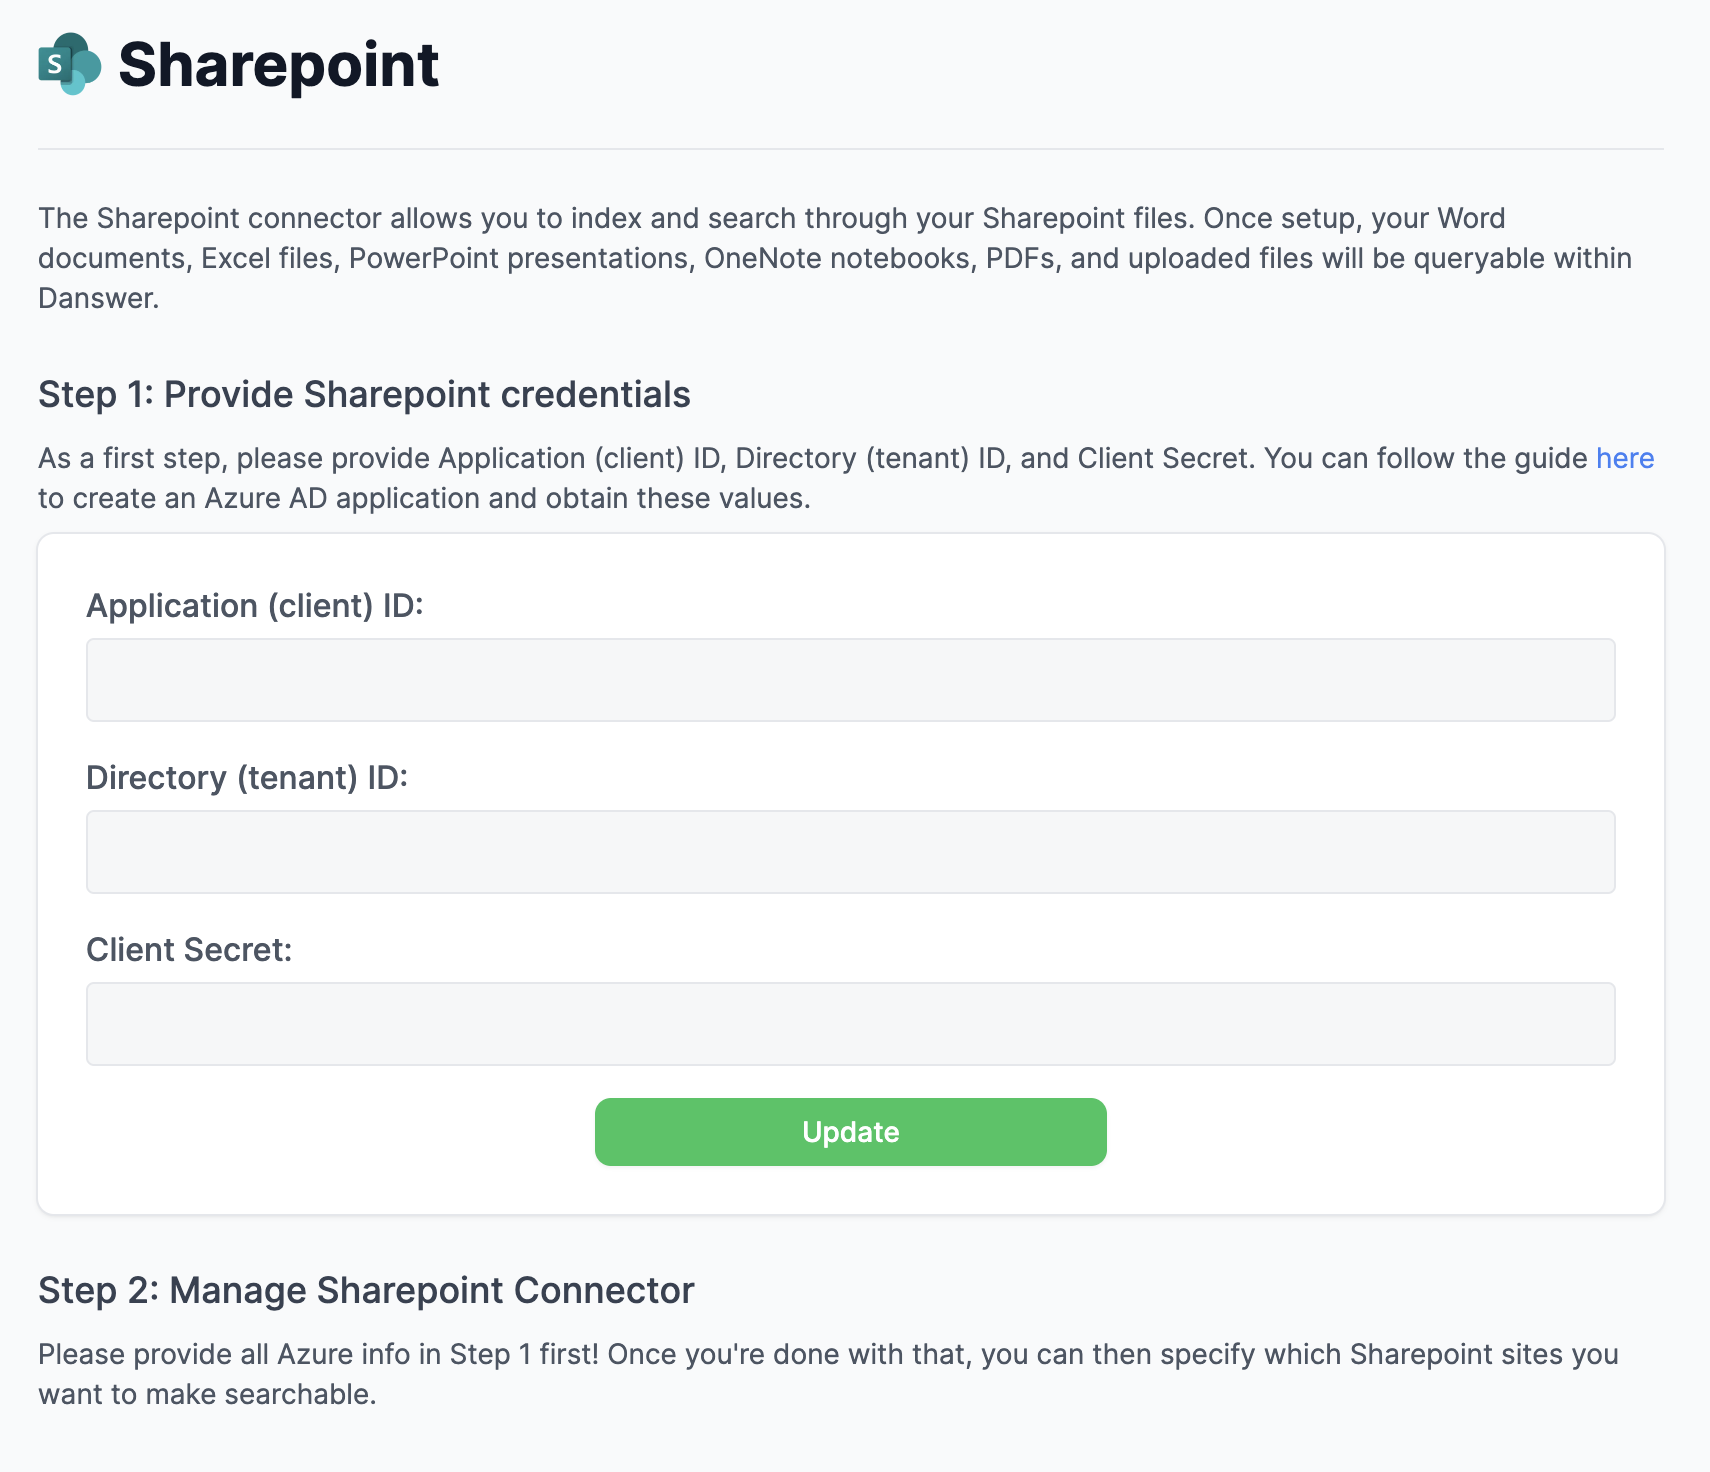
1. Navigate to the Admin Dashboard and select the **Sharepoint** Connector Tile.
2. Provide the **Application (client) ID**, **Directory (tenant) ID** and **Client Secret Value** from steps above.
3. Select a list of sites to pull from or leave blank and click **Connect** to pull everything.
* *Advanced:* If you selected **Sites.Selected** in the scope selection step above, you will need to enter a list of sites you want to index as the App doesn't have permission to list all sites.
1. Log in to [azure portal](https://portal.azure.com/#home) for your organization.
2. Navigate to “app registrations” using the search bar.
3. Click `New Registration`.
4. Name it something like “UtopikAI Sharepoint Connector”, leave everything else as default, and click `Register`.
5. Under “Essentials” in the overview tab, you will find the **Application (client) ID** and **Directory (tenant) ID**. Save those for later.
6. Navigate to the “Certificates & secrets” tab in Azure Portal and click `New client secret`.
7. Fill out he description, set the expiration to 24 months, and click `Add`.
8. Copy the secret value in the **Value** column for later.
9. Navigate to the "Api Permissions" tab in the azure portal and click `add a permission`.
10. Click **Microsoft Graph**, then click on `Application permissions`.
11. Navigate to the “sites” permission group.
12. Select the checkbox for **Sites.Read.All**.
* *Advanced:* If you want to limit the sites this app has access to, select **Sites.Selected**. However, if you do this, you will need add the App you are currently registering to each site you want to index.
13. Click **Add permissions**.
14. Finally, click **Grant admin consent for \** (located next to **Add a permission**) and click **Confirm**.
### Indexing
1. Navigate to the Admin Dashboard and select the **Sharepoint** Connector Tile.
2. Provide the **Application (client) ID**, **Directory (tenant) ID** and **Client Secret Value** from steps above.
3. Select a list of sites to pull from or leave blank and click **Connect** to pull everything.
* *Advanced:* If you selected **Sites.Selected** in the scope selection step above, you will need to enter a list of sites you want to index as the App doesn't have permission to list all sites.