> ## Documentation Index
> Fetch the complete documentation index at: https://docs.utopikai.com/llms.txt
> Use this file to discover all available pages before exploring further.
# ClickUp Connector
> Access tasks from Clickup
## How it works
The ClickUp connector will pull in all tasks from the ClickUp workspace, or specific space(s), list(s), folder(s) specified by the user.
Tasks are updated every **10** minutes.
## Understanding ClickUp Hierarchy
In Clickup, there are multiple containers which contain task(s). These could be -
* Entire Workspace
* Spaces
* Folders
* Lists
Detailed information on the hierarchy of above mentioned objects is available [here](https://help.clickup.com/hc/en-us/articles/13856392825367-Intro-to-the-Hierarchy)
 ## Setting up
### Authorization
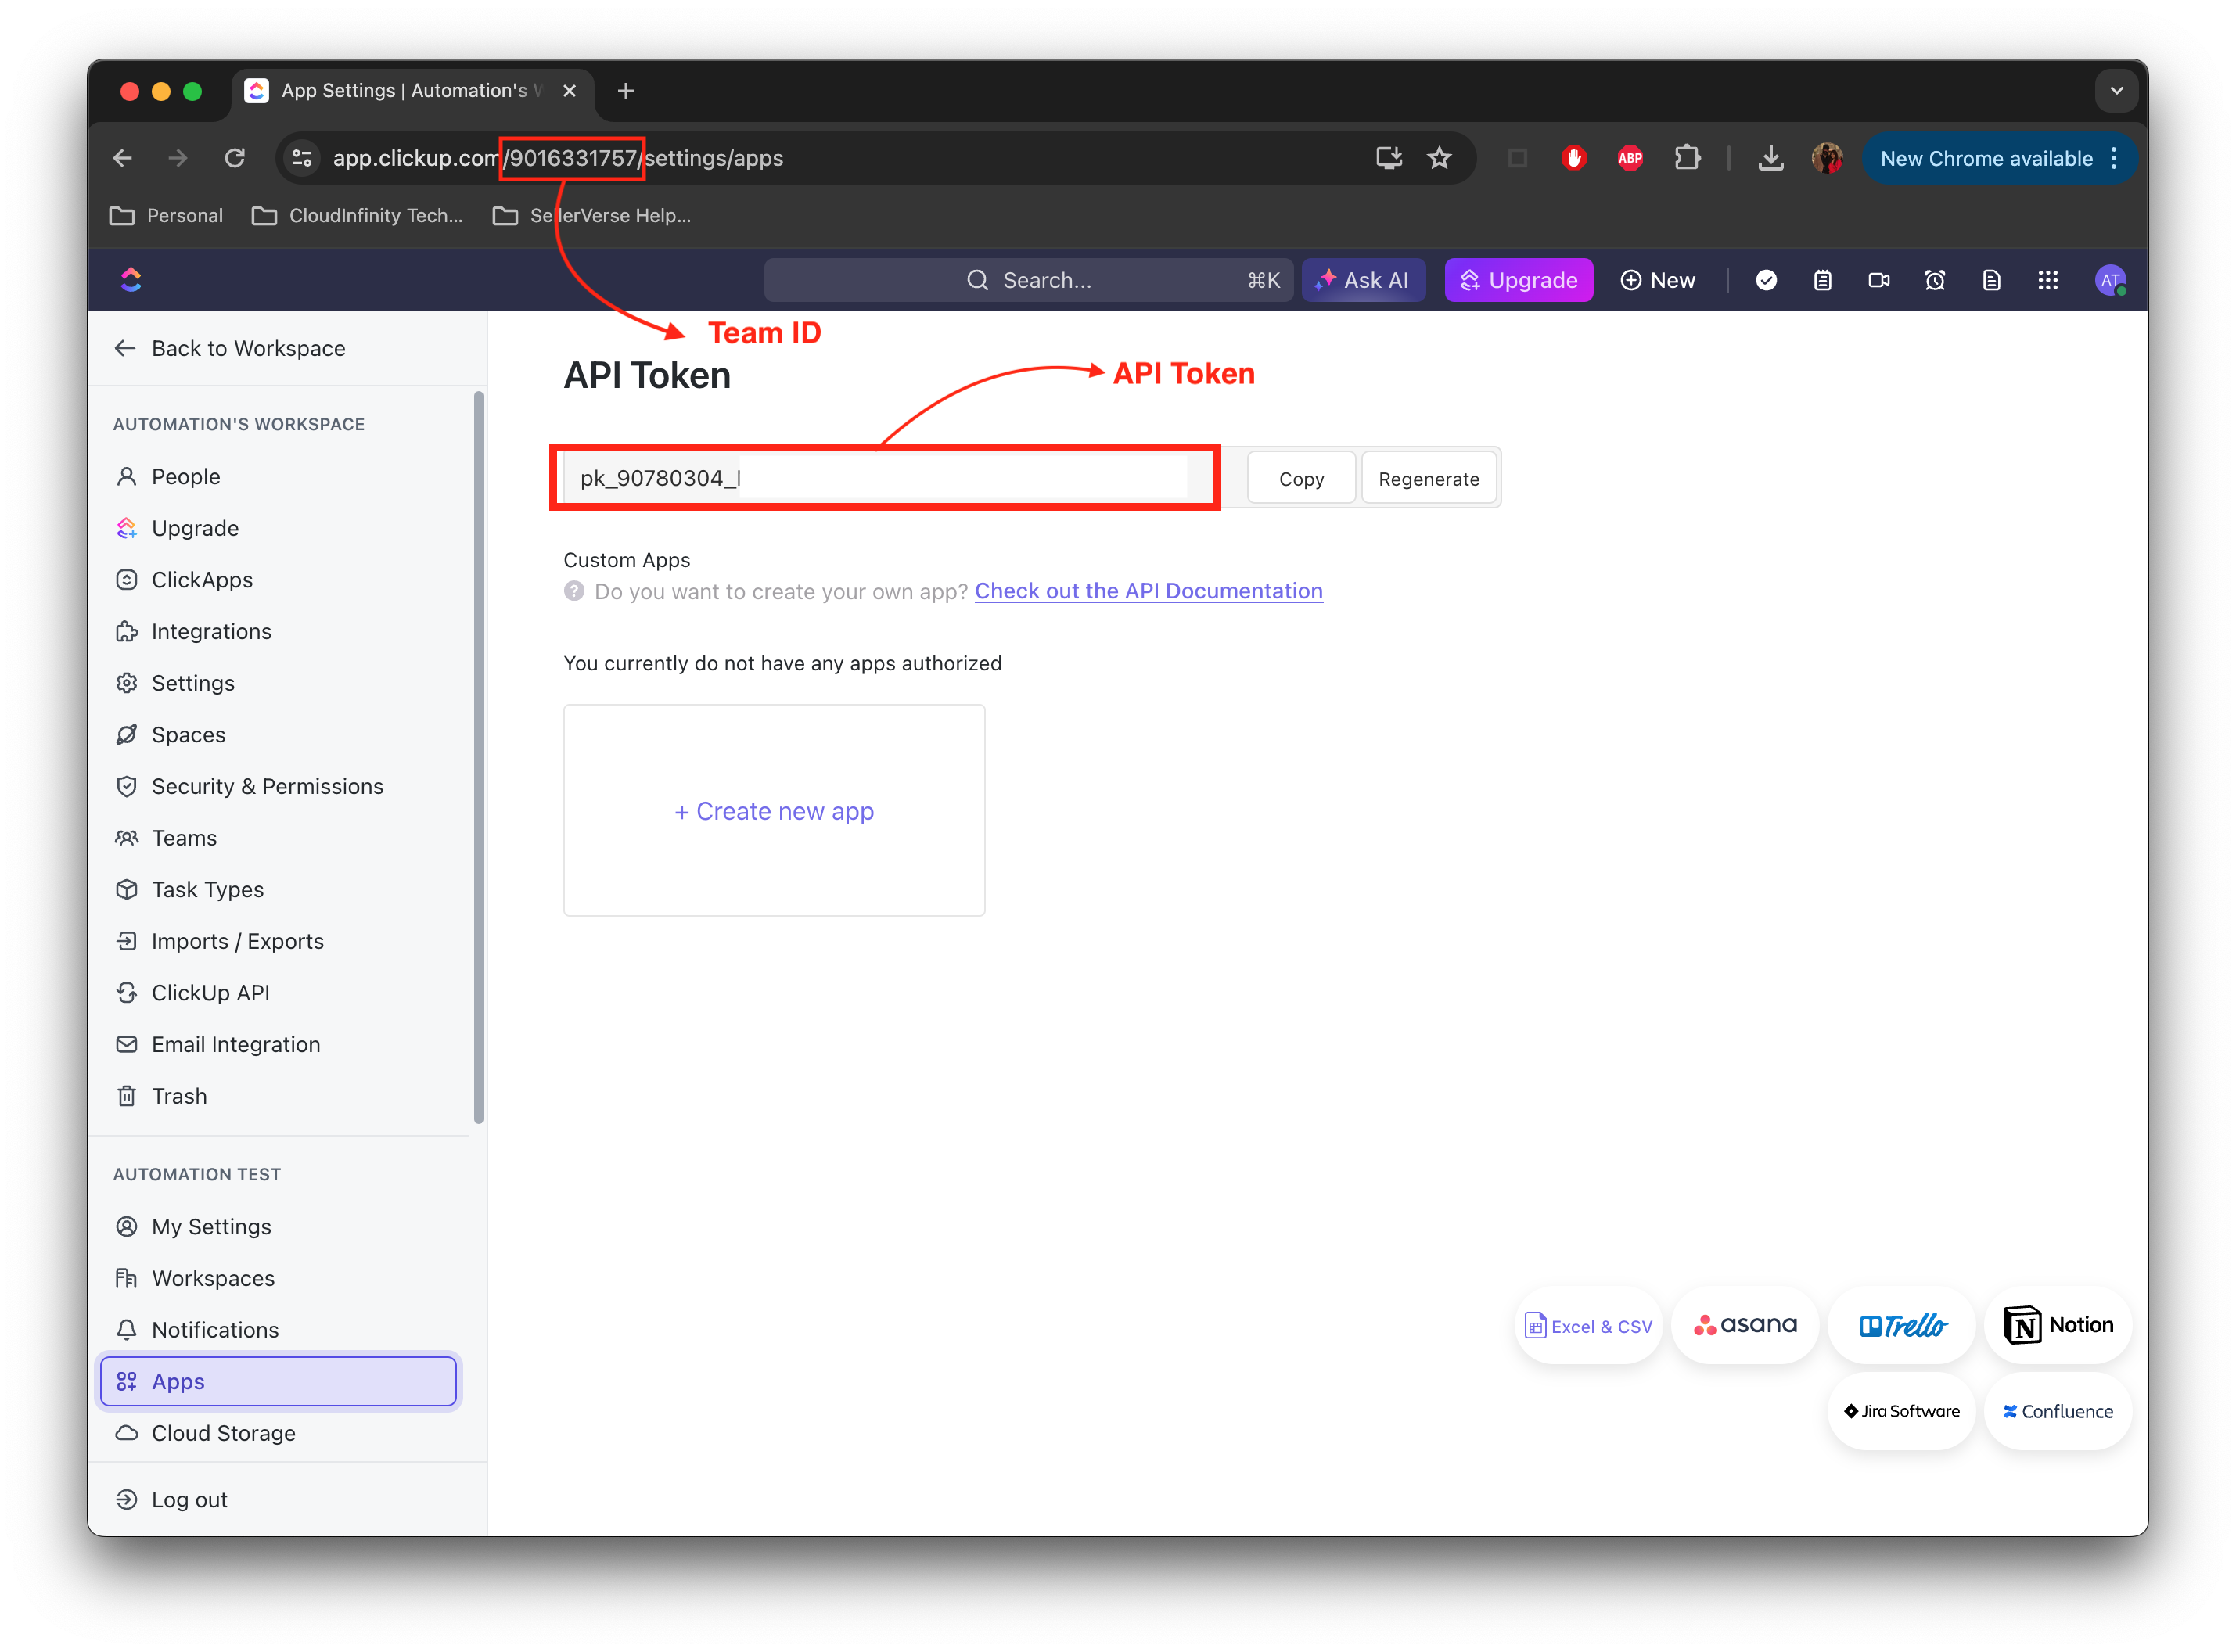
1. Log into ClickUp.
2. In ClickUp 2.0, click your avatar in the lower-left corner and select **Apps**.
In ClickUp 3.0, click your avatar in the upper-right corner, select **Settings**,
and scroll down to click **Apps** in the sidebar.
3. Under API Token, click **Generate**.
4. A Personal API token will be generated and displayed!
## Setting up
### Authorization
1. Log into ClickUp.
2. In ClickUp 2.0, click your avatar in the lower-left corner and select **Apps**.
In ClickUp 3.0, click your avatar in the upper-right corner, select **Settings**,
and scroll down to click **Apps** in the sidebar.
3. Under API Token, click **Generate**.
4. A Personal API token will be generated and displayed!
 ### Indexing
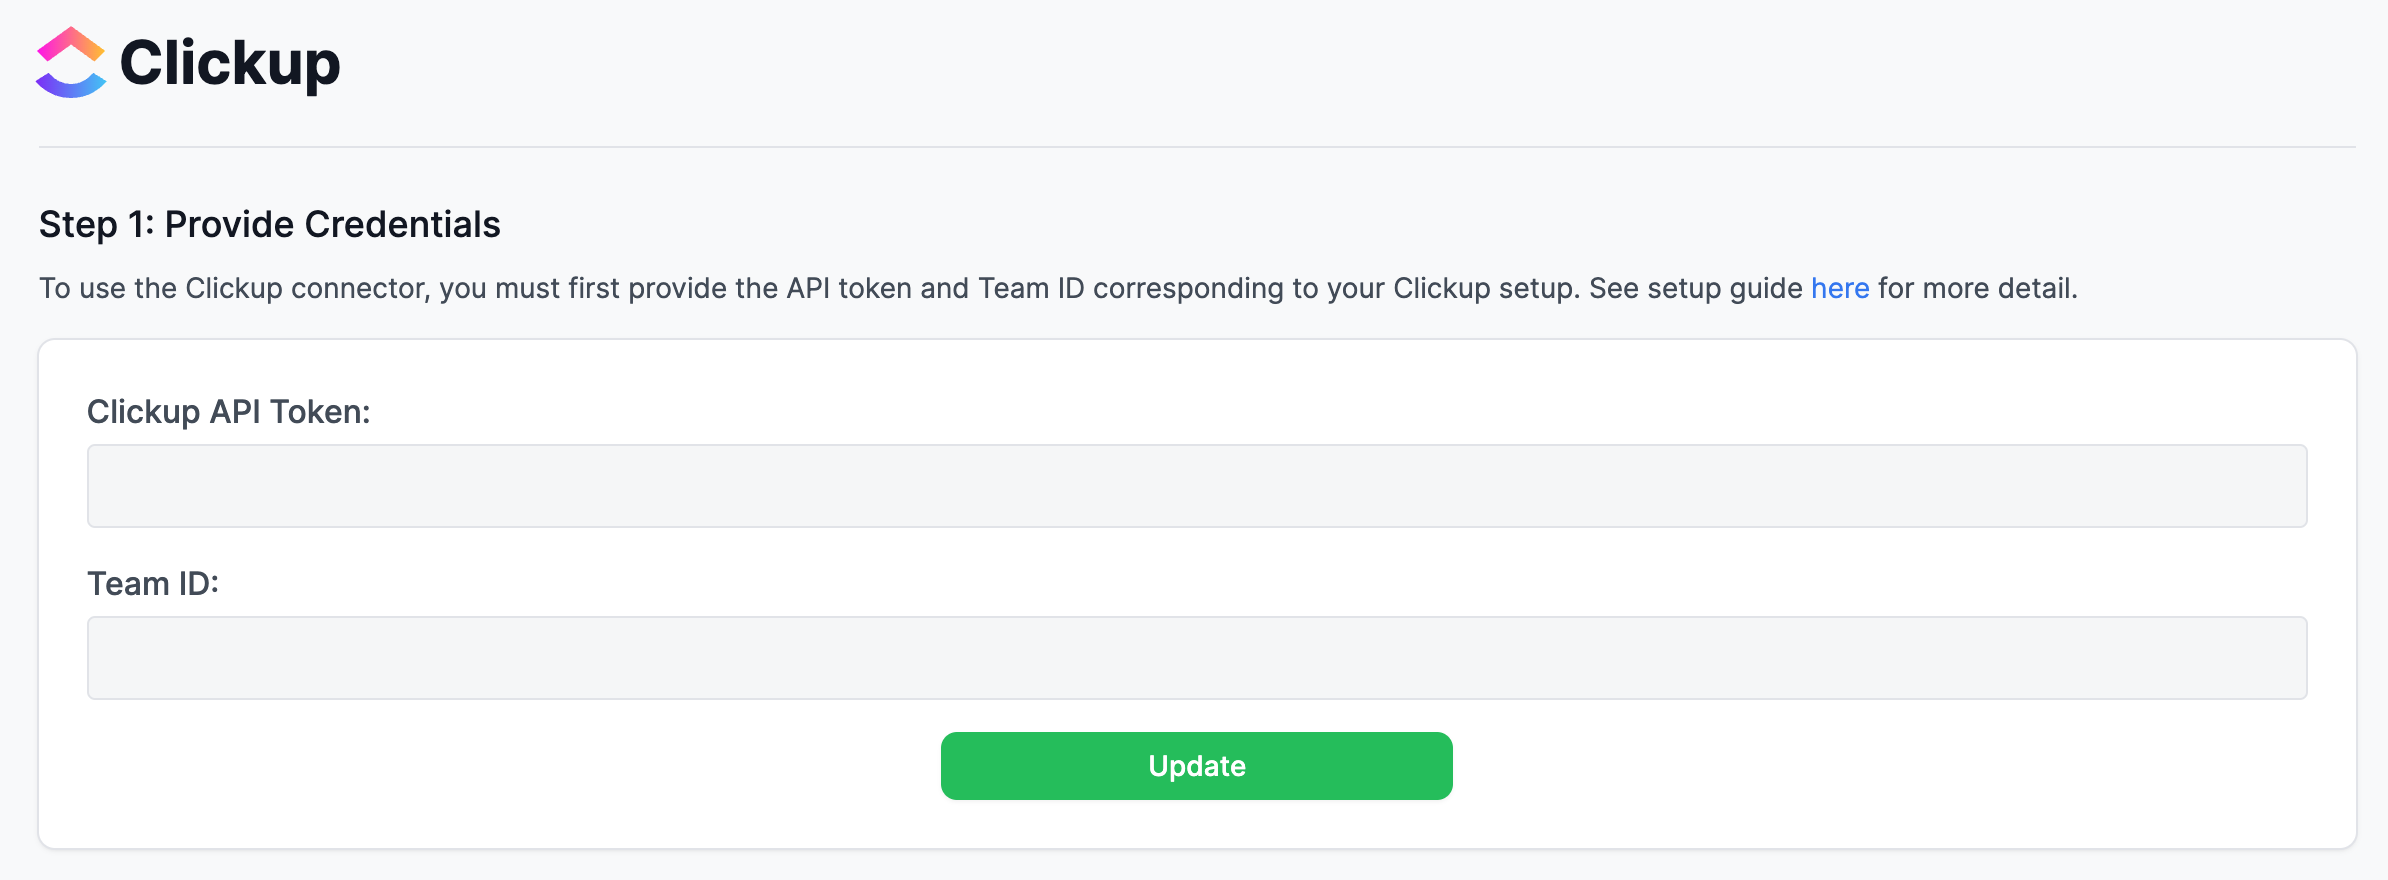
1. Navigate to the Admin Dashboard and select the **ClickUp** Connector
2. In **Step 1**, provide your **API Token** and the **Team ID** from above.
### Indexing
1. Navigate to the Admin Dashboard and select the **ClickUp** Connector
2. In **Step 1**, provide your **API Token** and the **Team ID** from above.
 3. Select the type of connector you want to pull in tasks from.
**Notes**
* This could be Entire Worspace, Space(s), List(s), or Folder(s).
* To pull tasks from entire workspace, just select Entire Workspace from the dropdown, and do not add any ID(s).
* To pull tasks from specific space(s), folder(s), or lists(s), select the respective option from the dropdown, and add the ID(s) below. At least one ID needs to be added in this case.
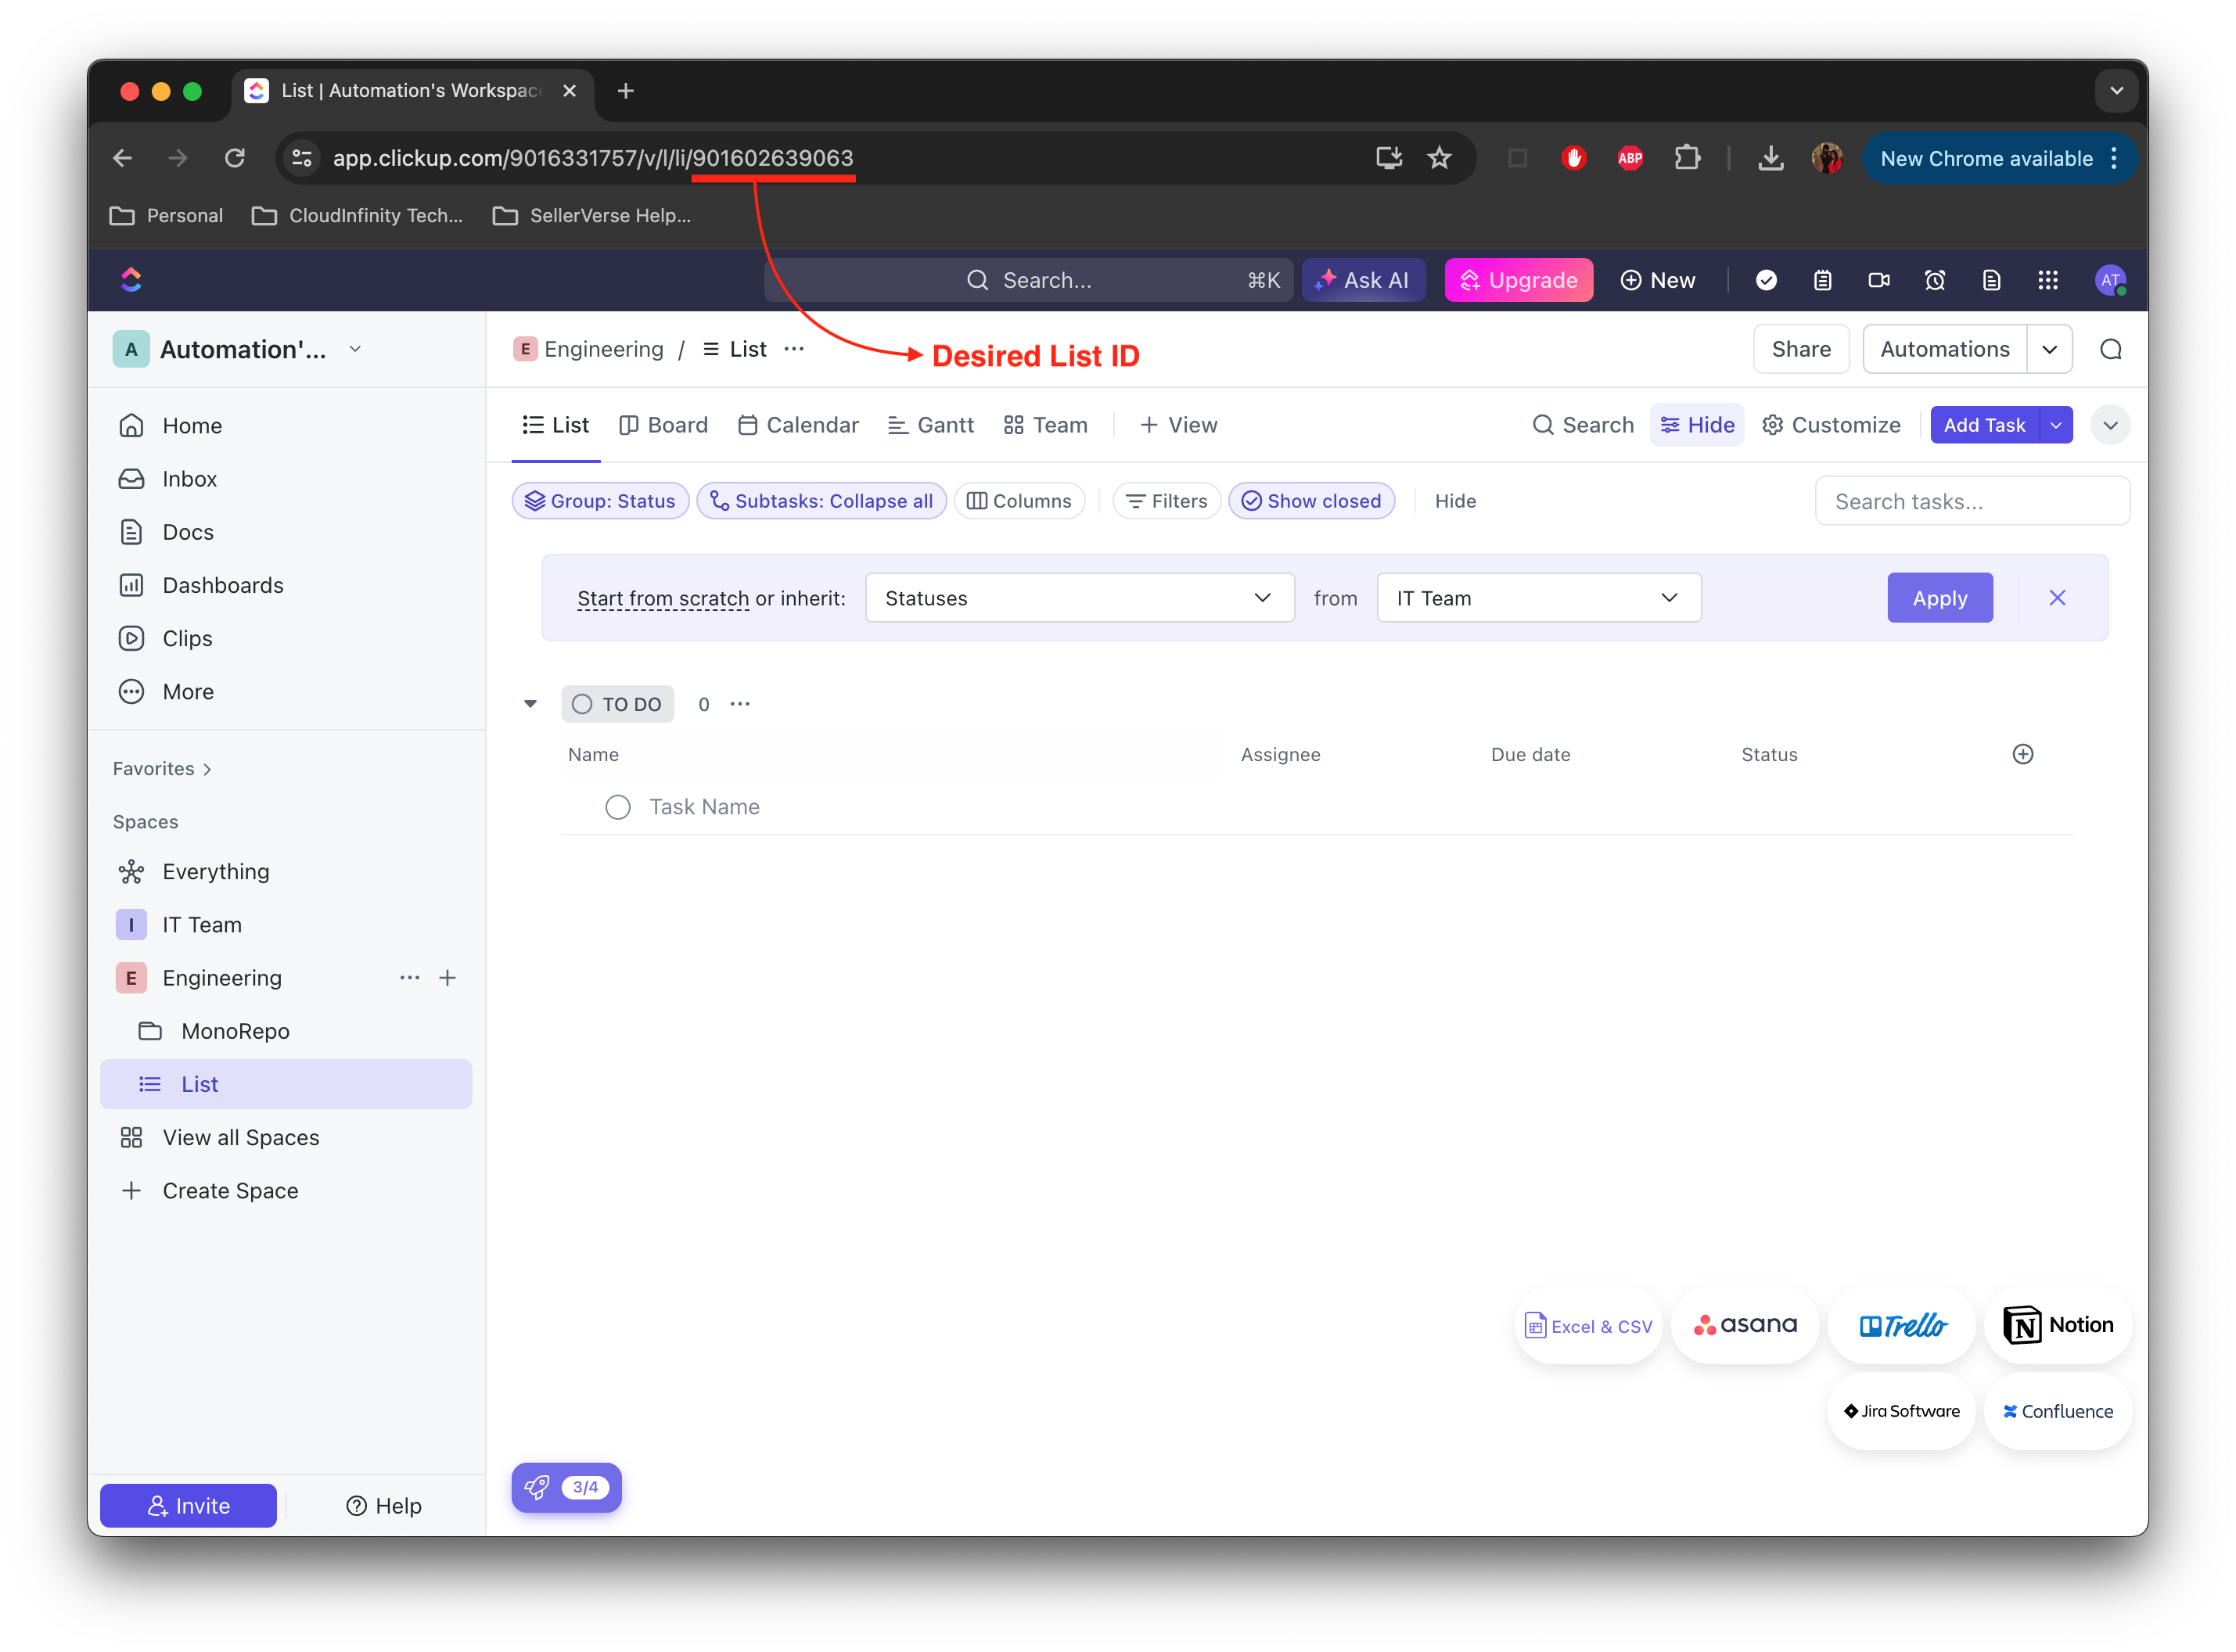
* The space id(s), folder id(s), list id(s) could be found in the web url in Clickup.
For example, if you open a **list** in the ClickUp UI, you will see the list id in the url address bar as follows -
3. Select the type of connector you want to pull in tasks from.
**Notes**
* This could be Entire Worspace, Space(s), List(s), or Folder(s).
* To pull tasks from entire workspace, just select Entire Workspace from the dropdown, and do not add any ID(s).
* To pull tasks from specific space(s), folder(s), or lists(s), select the respective option from the dropdown, and add the ID(s) below. At least one ID needs to be added in this case.
* The space id(s), folder id(s), list id(s) could be found in the web url in Clickup.
For example, if you open a **list** in the ClickUp UI, you will see the list id in the url address bar as follows -
 4. If any of the Space(s), List(s), or Folder(s) connector type is selected, add one or more respective IDs to index the tasks from.
5. Check **Retrieve Task Comments?** to also retrieve and index all comments for each indexed task. Leave this unchecked if you dont want to index task comments.
6. Click `Connect` to begin indexing.
4. If any of the Space(s), List(s), or Folder(s) connector type is selected, add one or more respective IDs to index the tasks from.
5. Check **Retrieve Task Comments?** to also retrieve and index all comments for each indexed task. Leave this unchecked if you dont want to index task comments.
6. Click `Connect` to begin indexing.